Azure's App Services allow you to very easily deploy a project to the cloud without the hassle of server management. It is a wonderful solution if you have an application on github that you simply want to run.
Babylon.js's documentation website is deployed to azure using the continuous deployment feature, which works wonderfully. I will write about how I got this to work in a different post.
One thing App Services don't excel in, is direct access to the underlining OS. debugging the server itself is harder than on a root server, where installing the needed servers and languages, and deploying is done manually by you. This is the downside of using a ready-made service.
We wanted to add an SSL certificate to the documentation website, and what's better than using the new Let's encrypt free certificate offer. Let's encrypt offers free(!) SSL certificates. Their certificates are valid for 90 days only, and needs to be renewed more often than traditional SSL certificates, but Let's Encrypt offers a wonderful way of doing that automatically.
Lucky for us, a wonderful developer, Simon J.K. Pedersen has developer a let's encrypt azure extension - a very developers-oriented extension that runs background tasks to assign the certificate and automatically renew it before it expires. Wonderful!
Now, I said developers-oriented for a reason. During the installation you will notice that at the current state of things a lot of patience and general knowledge is needed. The current version of the extension. 0.4.5, also shows that it is actually not yet 100% finished. But can be used!
I tried following the installation guide on github, but had a problem during the step to grant permissions to the service principal. I simply couldn't find the user. I followed the steps a few times, added 2 new Active Directories, tried different regions, but nothing worked. Azure refused to show me the user. What saved me, was this wonderful guide written by Nik Molnar of Microsoft. His guide shows how to do things a bit low-level using the Azure Powershell CLI.
A few notes about his guide:
Using a different directory other than your default
I have a few "tenants"/directories in my azure account, therefore Login-AzureRmAccount didn't work as expected. I created everything but the app was located on a different tenant and therefore wouldn't agree using the user I created. In order to fix that, I had to add two more parameters to the call: Login-AzureRmAccount -SubscriptionId "MySubscriptionId" -Tenant "MYTENANT.onmicrosoft.com". Afterwards I was logged in and could continue with the rest of the installation.
Assigning "Contributor" to the principal failed on first attempt.
This line: New-AzureRmRoleAssignment -RoleDefinitionName Contributor -ServicePrincipalName $app.ApplicationId didn't quite work as expected. The error was "PrincipalNotFound: Principal {......} was not found in the directory {.....}"
I assume it is due to asynchronous creation of the principal. Waiting a minute and running this command again was successful.
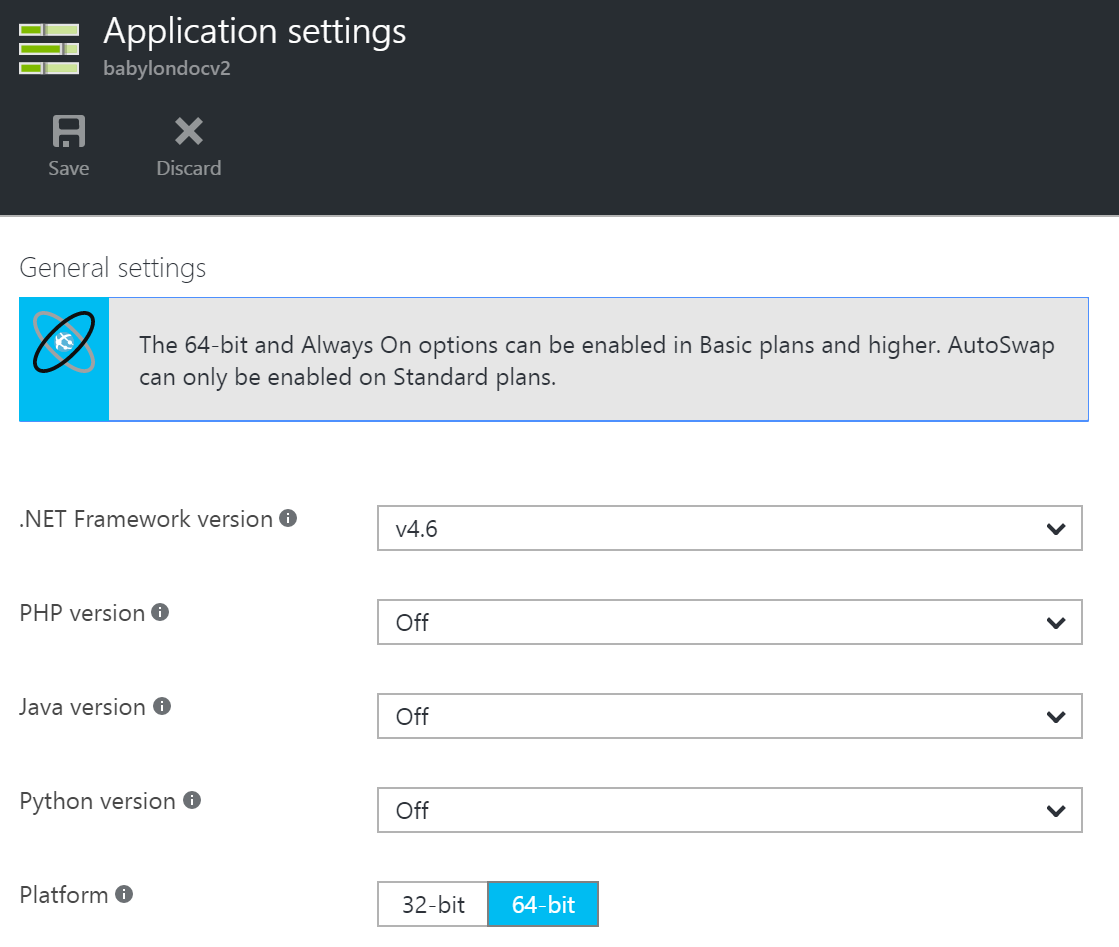
Choose the right architecture
When installing the extension, make sure you install the right one (32bit or 64bit). The link is to the x86 version, but when searching for the extension you would see two versions of it. To see the architecture of your application, check your application settings:
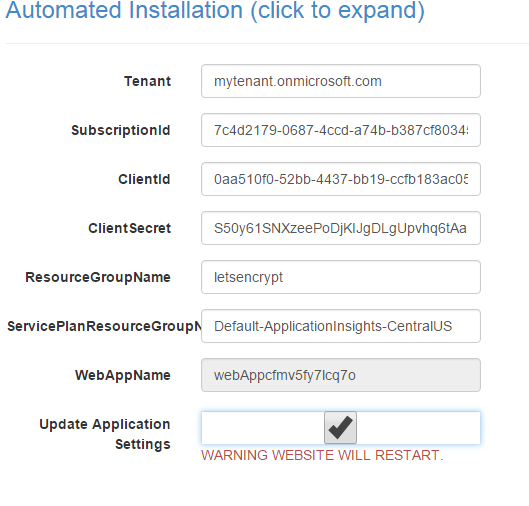
Modifying the application settings
Nik's guide states not to fill the boxes during the extension's installation. You don't have to add the variables to your application settings. the extension is doing it wonderfully by itself, if you mark the "update application settings" option when configuring the extension:
Make sure ./well-known/acme-challenge/ is available on your server
This is the most important step, that I have missed.
Let's Encrypt is using the challenge files located in this directory to validate the server and send you back the certificate. If this directory is missing, the extension fails silently. It will simply not continue after asking for a certificate.
If you deploy a simple static web app it will be available automatically. The files are written to the /site/wwwroot directory (you can see it in the debug console by going to going to {sitename}.scm.azurewebsites.net/DebugConsole.
The documentation website is a simple express.js application that doesn't expose this directory. To solve this, all I had to do was to add this line to my app.js:
app.use('/.well-known', express.static('.well-known'));
This will server any files located under the well-known directory as a static file. Which was exactly what Let's Encrypt needed in order to validate the server and issue a certificate.
Different platforms and server-types need different configuration. Just make sure that the directory is available, and things will work.
Use staging mode to test!
Let's encrypt allows you to generate up to 5 certificates a week. During the installation, thinking I did something wrong (or didn't click) I made 3 invalid certificate-requests. Try first with the staging option (which will assign a self-signed SSL certificate). Only when it works and you can see the certificate in the extension home generate a real certificate.
The SCM site is awesome!
I am a beginner on Azure. I use what the console allows me to, and knew nothing of this WONDERFUL website each site of yours has. Nik describes it as a "treasure trove of useful information and tools", which is totally right!
The SCM page is located at https://{sitename}.scm.azurewebsites.net/. Use it!
And that's it!
Those were the problems I encountered during installation. Did you encounter anything else? Want to share it with the rest? Please comment and let us know how you solved it!
I can only thank Simon J.K. Pedersen for answering the issue I created quickly and patiently. I know can sometimes drive yo crazy getting the same question in a different form (RTFM man!). So thanks! :)